webgl
A brief intro to WebGL shaders


How does Dropbox make that effect where it looks like I am painting a McLaren as I drag my mouse over it?
They are using WebGL with no libraries or frameworks, just raw hand coded WebGL shaders.
Common WebGL misconceptions
A lot of people hear WebGL and think 3D and heavy with big slow libraries, but it does not have to be that way.
WebGL shaders use a small specialized language that can seem scary at first, but they are not.
WebGL itself isn’t slow. Using large complex models like this can be.
Let’s learn the basics so you can make cool stuff by hand or with AI like I did in Builder.io, then use it for effects like this.
The world’s smallest shader
What's really cool about WebGL is it gives you per pixel precision. Fragment shaders run super fast concurrently on your GPU per pixel.

This gives us a level of per-pixel control we can’t do any other way on the web, to let us do all kinds of cool things:
Playing with WebGL effects through prompting in Builder.io.
A fragment shader runs once per pixel and returns the color for that pixel. The absolute smallest version just hard codes a color. That is it.
Change the numbers to make it blue or red. You now have a working shader.
The idea for the reveal
We have two images: one is the outline or unpainted car, the other is the painted version.

The fragment shader chooses per pixel which one to show. Near the cursor we reveal paint, away from the cursor we show the outline. That is the entire trick.
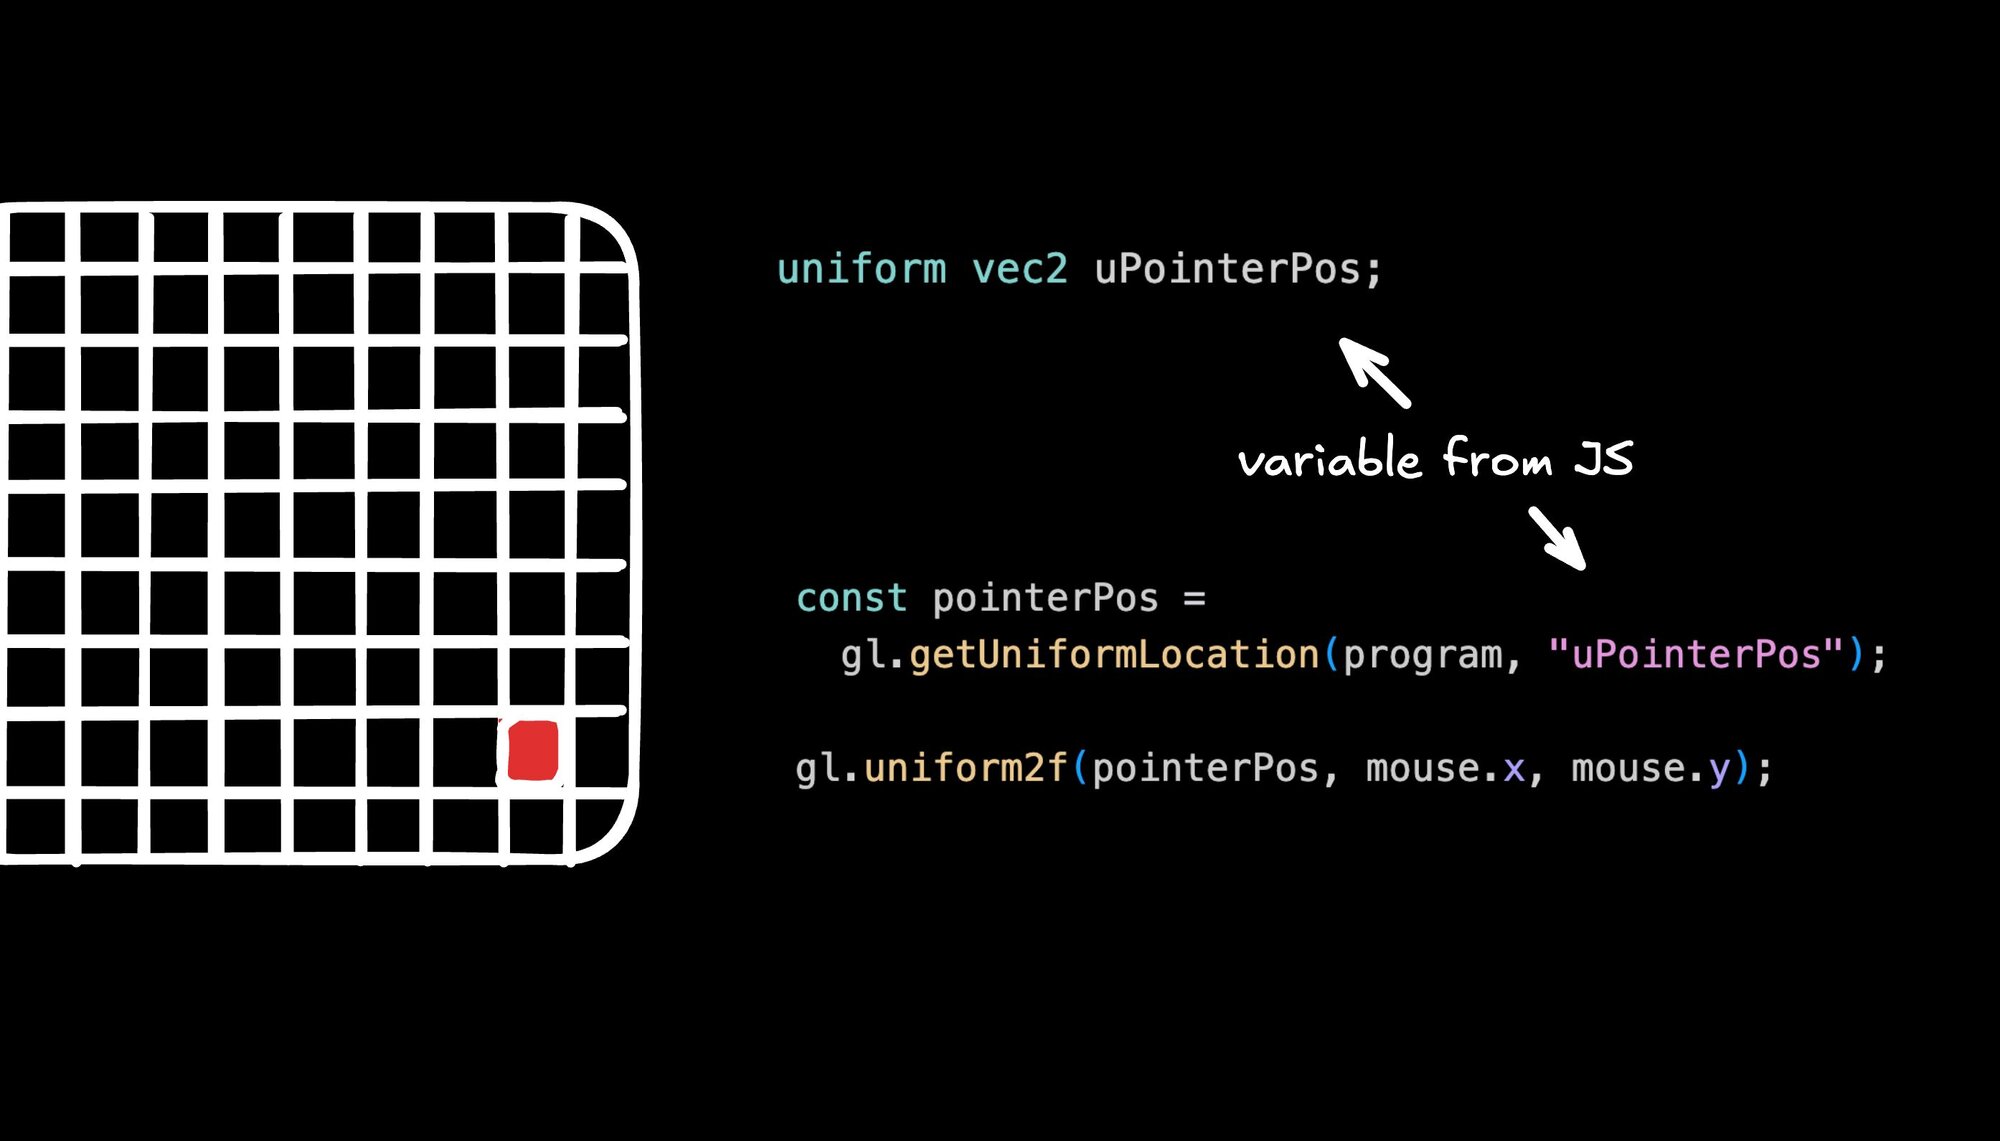
To do that we pass a few values from JavaScript to the shader as uniforms:
uBaseImagethe outline imageuRevealImagethe painted imageuPointerPosthe mouse position in pixelsuViewportthe canvas size

Inside the shader we compute a simple circular mask around the mouse and use it to mix between the two images.
Start with a soft circle so the edge looks smooth. Later you can add a tiny bit of noise if you want texture.
You can stop here. It already feels good.
The tiny JS glue
You only need the essentials. Create a canvas and a webgl context, compile the tiny vertex shader and the fragment shader above, draw a full screen rectangle, load two textures, and update uniforms each frame.
No framework. One draw call. The shader does the work.
Why this works so well
Fragment shaders give per pixel control and run in parallel on the GPU, which makes this kind of effect fast. The code stays small because you are only writing the pieces you need.
How I built and shipped it
I described the effect in plain language, listed the uniforms, and let Builder.io scaffold the shader and the minimal WebGL setup.
I uploaded those two images (get them here and here) and described the effect:
I tweaked a few values in code, kept it dependency free so performance stayed high, and sent a pull request when it felt right.
Vibe code with prompts, send real PRs
The cool part about using Builder.io for this or other effects is you can apply them to your real production code (your actual existing sites or apps).
Once you are happy with your enhancements, you can send a pull request to engineering to review, and get your handy work live to real users.
Where to go next
If you want a bit more realism later, add additional noise to the mask for a rougher edge or accumulate the reveal into a texture so paint stays after the cursor passes. You can prompt an agent to add those once the basic version is working.
That is it. Start with the hard coded color so the shader feels concrete. Swap in the two images. Add the simple circle. Ship. Then layer texture if you want.
Here’s the full code I landed with:
Share