Web Development
Active Navlink Transitions with HTML, CSS and JavaScript


In this blog post, we'll explore how to create an active navlink transition using HTML, CSS, and JavaScript, a feature that can add a nice touch to your portfolio or landing page.
Generating markup from your design
To begin, we'll use Visual Copilot, an AI powered Figma to Code plugin, to accelerate the process. This tool can convert Figma designs into HTML and CSS code, saving us valuable time. Here are the steps:
1. Start with a mockup in Figma, which you can find here.

2. Run Builder.io's Figma plugin, select your design, and click the Generate code button. This action generates the initial HTML and CSS.

3. Copy and paste the generated code into a playground of your choice like Codepen, for example.

Here's the HTML code generated by Visual Copilot in Quality mode:
And here’s the generated CSS:
Adding the navlink transition
HTML changes
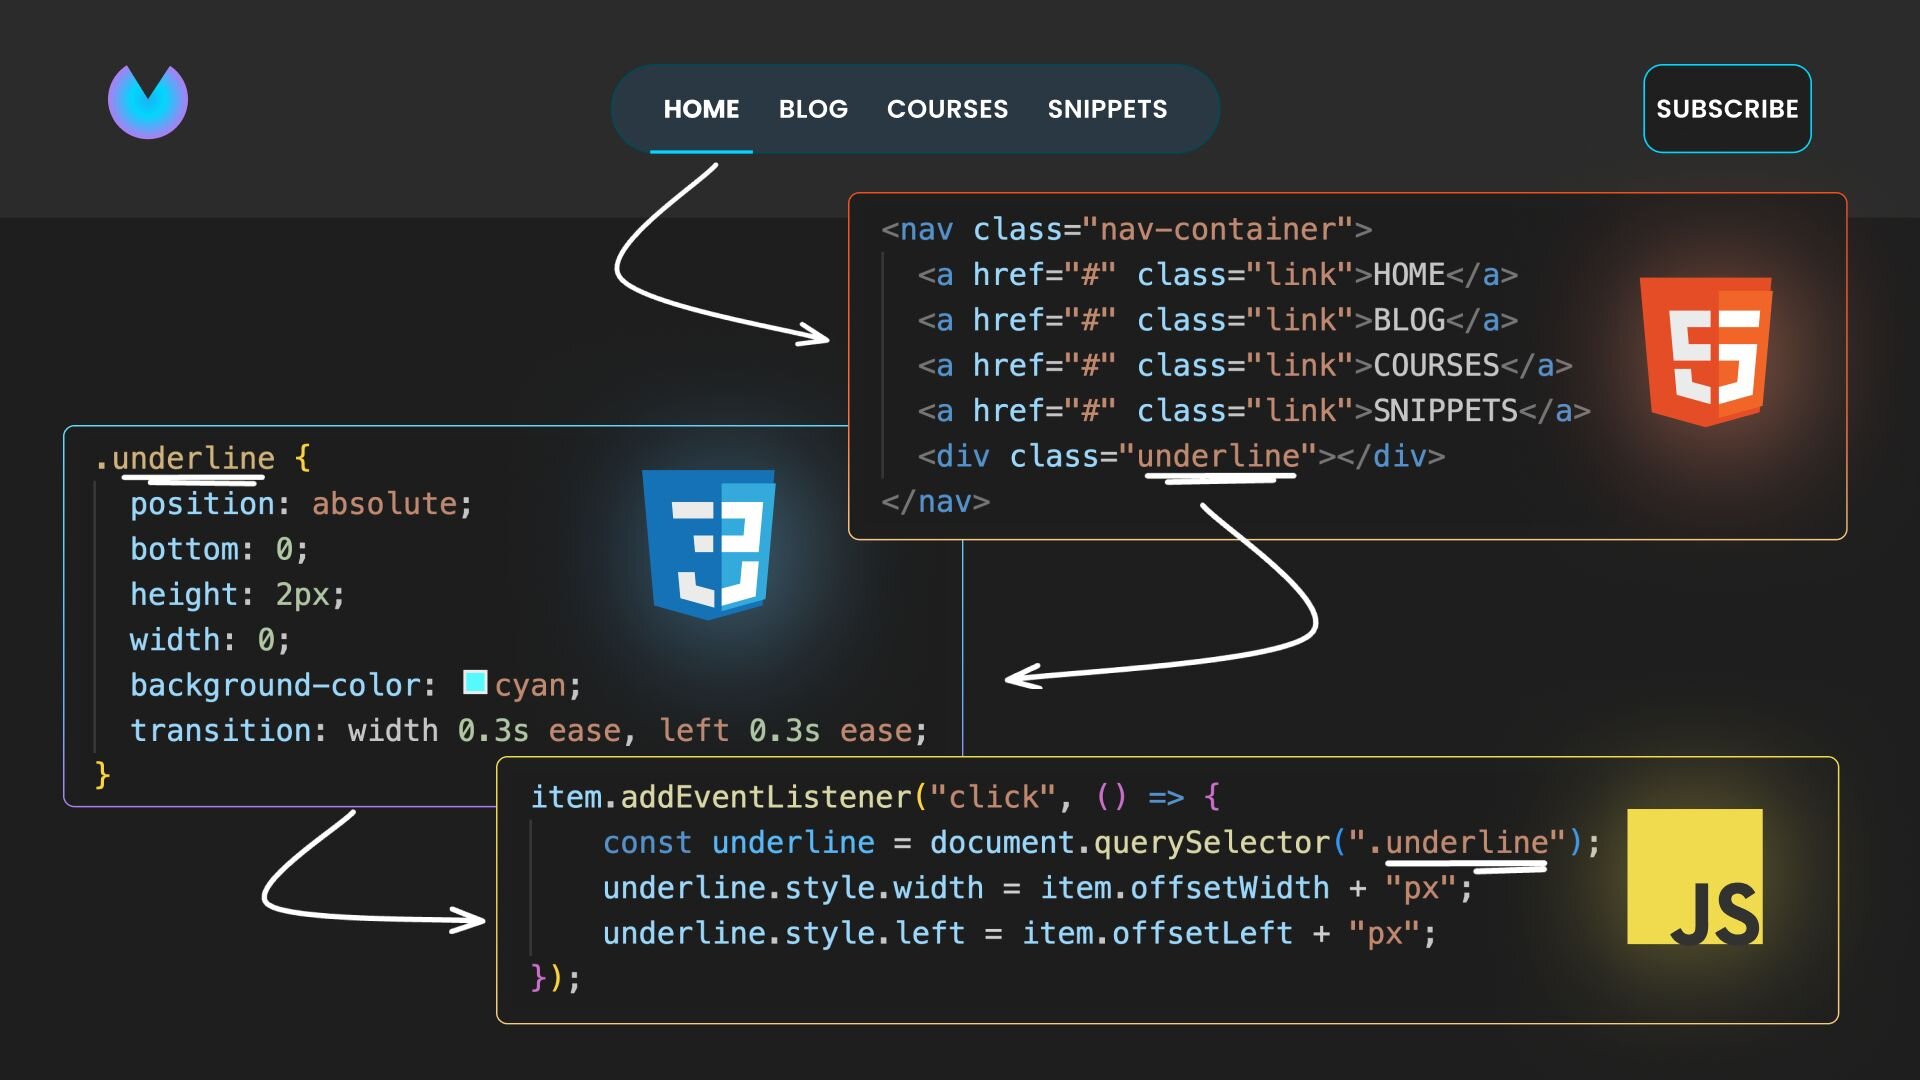
In the HTML, add a div tag with the underline class right after the 4 links to create the visual underline effect:
CSS changes
In the CSS styles, make the following changes to customize the navlink appearance:
- Remove the underline from all the navlinks using
text-decoration: none;to prepare for the custom underline effect. - Set the
navcontainer to a relative position. - Add styles for the
underlineclass to create the underline effect.
JavaScript changes
For the JavaScript logic, find all the link elements and attach a click event handler. Within the handler, update the width and left properties of the underline element to match the clicked link’s offsetWidth and offsetLeft properties:
The active navlink underline should now transition smoothly when a link is clicked.

You can find the full source code on my Codepen
Share