Web Development
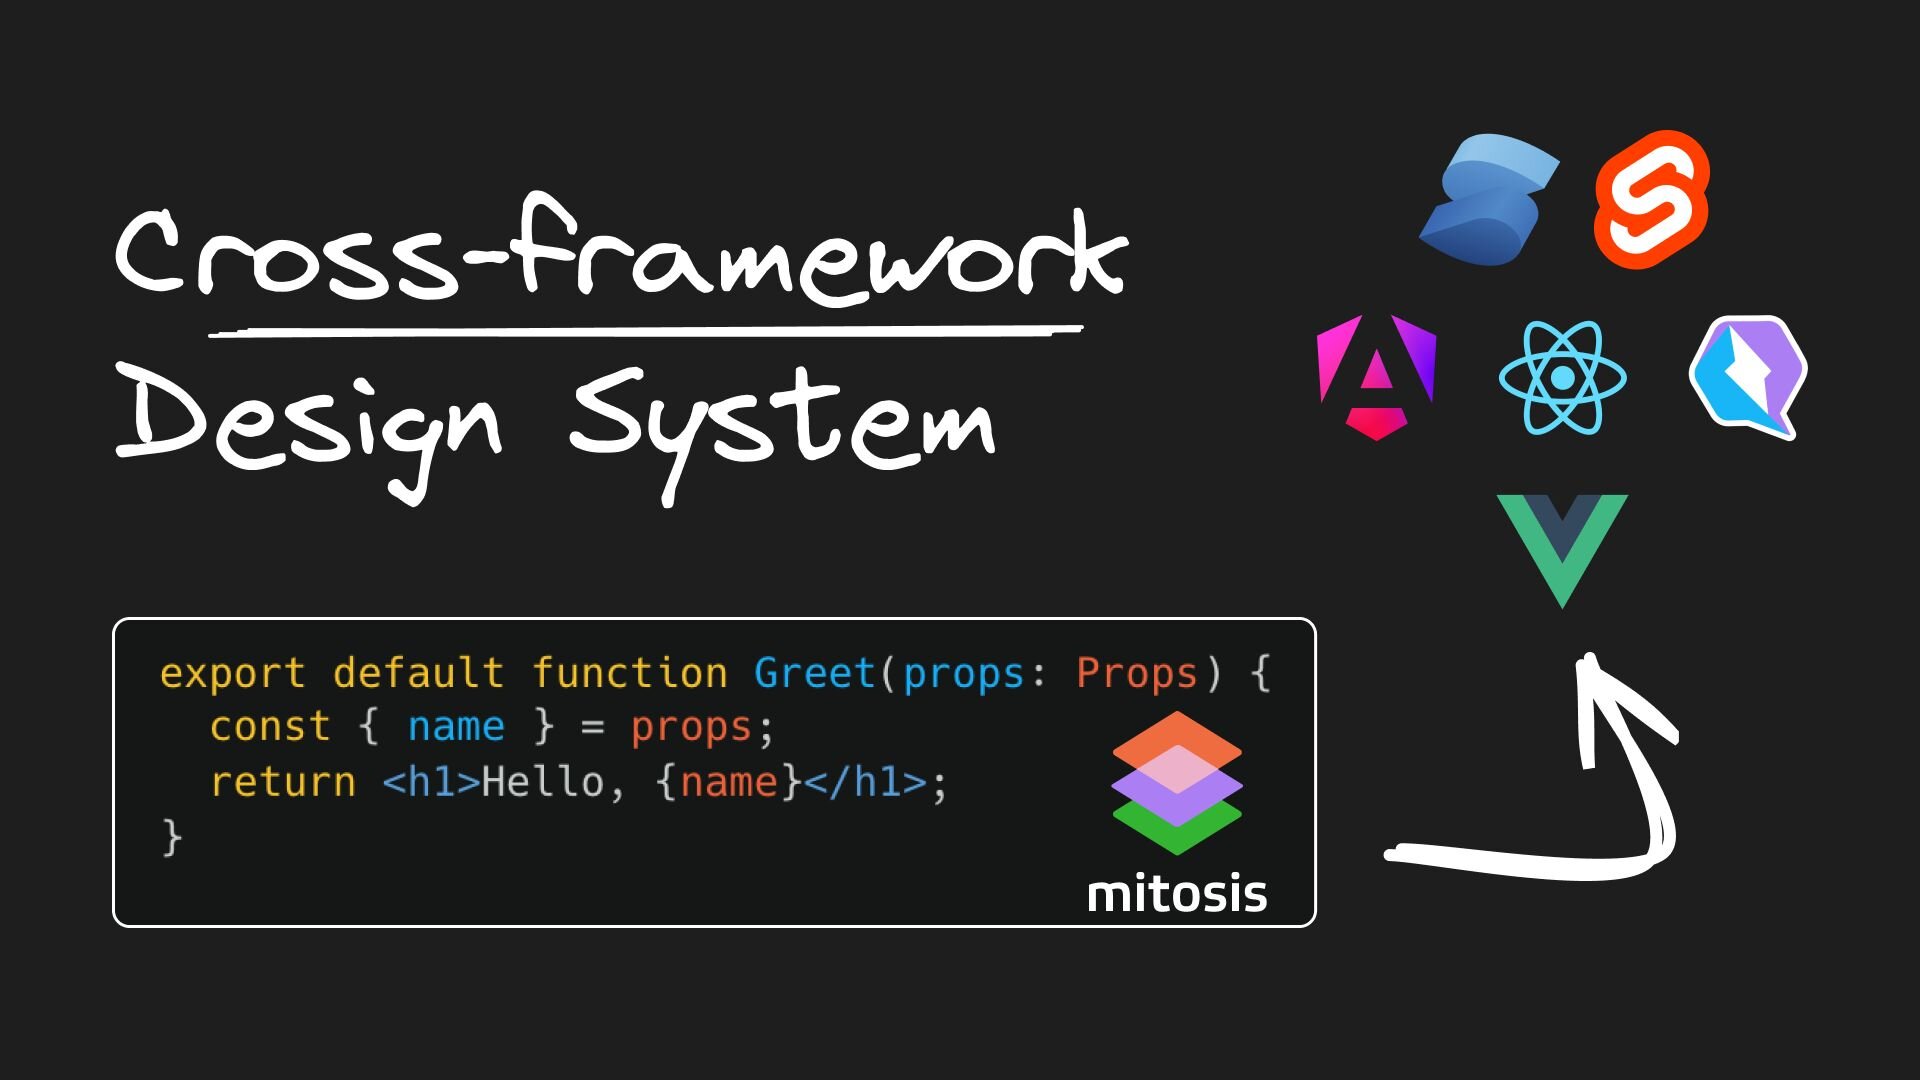
Getting Started with Mitosis: Creating a Cross-Framework Design System


Imagine if you, as a maintainer of design systems, could cater to different web frameworks without any extra effort or repetition in managing libraries.
Imagine if your team could seamlessly align design systems for a consistent user experience across various platforms, no matter the web frameworks you use.
Imagine if your business could fundamentally transform the way your engineering teams operate, making your development processes more efficient and effective.
At Builder.io, we've developed Mitosis — a solution to create a single source of truth for all reusable components within your design system. This blog post will guide you through getting started with Mitosis and how it can streamline the management of multi-framework environments.
What is Mitosis?
Mitosis is an open-source tool that transforms JSX components into fully functional components for frameworks like Angular, React, Qwik, Vue, Svelte, Solid, and React Native. By writing your UI components once in JSX, you can deploy them across any platform, eliminating the need to rewrite code for each framework.
This promotes consistent component design and enhances productivity, maintaining uniformity throughout your development process.
Explore it yourself with the Mitosis fiddle.
Why use Mitosis?
With Mitosis, you can streamline your workflow and reduce redundancy without compromising the quality of your design system. Mitosis ensures that your design language speaks clearly and consistently, whether you're working in React, Vue, or any other framework.
By simplifying the development process, Mitosis accelerates project timelines, allowing your team to focus more on innovation and less on integration.
Challenges with web components
While web components are standalone elements designed for reuse across web applications, they present some key challenges for design systems:
- Web components do not natively render on the server side. This can be problematic when using frameworks that rely on server-side rendering for performance and SEO benefits.
- Web components do not seamlessly integrate with your library or framework. For instance, web components do not inherently understand or interact with React's context.
- Web components often come with their own rendering libraries and dependencies, which can lead to performance overhead.
Although web components offer a modular and reusable approach to UI elements, these challenges can limit their viability. However, if supporting web components is a requirement, you can use Mitosis to generate them from a single source of truth. Mitosis supports Stencil, Lit, and raw web components as outputs.
How to get started with Mitosis
Create a new project:
Start a new Mitosis project by running the following command in your terminal:
When prompted, enter a project name and select your desired output. Currently, we support outputs for React, Svelte, and Qwik.
After making your selection, navigate to the project folder and install the dependencies.
Explore the project structure:
Focus on the library folder within your project. In library/src, you will find:
- An
autocompletecomponent - A
todo-appcomponent
Each component is housed in its own folder and written in a .lite.tsx file, the standard file format for Mitosis components. Also, explore the library/packages folder, which contains starter code for the outputs you selected during setup.
Run the project
1. Start the development server
From within the library folder, run the following command to start the development server:
This command automatically generates component code in the corresponding output folder. You write code once, and it gets converted into React, Qwik, and Svelte code.
2. Add a new component
Create a library/src/greet.lite.tsx file with the following code:
Saving the file triggers the automatic conversion of the Mitosis component into target components. Here is an example showing how a simple component is automatically translated from Mitosis to Svelte and React:
Here’s the Svelte component code:
And here’s the React component code:
3. Configure project settings
In the root of your project, add a mitosis.config.js file to
specify the target output. Possible targets include Alpine, Angular,
customElement, HTML, Mitosis, Liquid, React, React Native, Solid, Svelte,
Swift, Template, Webcomponent, Vue (version 3), Stencil, Qwik, Marko, Preact,
Lit, and RSC.
Here's the Vue component code if you were to configure Vue as a target:
Verify your components
After generating the component code with Mitosis, the next step is to ensure that your components work as expected. Here's how to verify them using Svelte as the target framework:
1. Export the components
Export the Greet component from the library/src/index.ts file:
2. Build the library
From the library/packages/svelte folder, build the Svelte components by running the following command:
3. Test in a Svelte application
Navigate to the test-apps/svelte folder:
Open the src/routes/+page.svelte file and import the component:
4. Start the dev server
Start the development server for your Svelte app with the following command:
5. Verify the component
Open http://localhost:5173 in your browser. You should see the functioning Greet component along with the other components.
By following these steps, you'll be well on your way to developing with Mitosis, taking advantage of its capability to write once and deploy to multiple frameworks.
Syncing design systems from Figma
You can leverage Mitosis in conjunction with Visual Copilot to efficiently translate Figma designs into code.
Visual Copilot is an AI-powered Figma to code toolchain that leverages AI to swiftly and accurately convert Figma designs to clean and responsive code.
To use this integration:
- In Figma, select the layer you wish to convert and use the Visual Copilot plugin.
- Click the Generate Code button to start the conversion.
- Set Mitosis as the target framework for the generated code.
- Copy the code and paste it into a file within the
library/srcdirectory of your Mitosis project. For example,library/src/login/login.tsx. Mitosis will then automatically adapt this code to your selected frameworks, maintaining a consistent design system across multiple platforms.
This method ensures that developers can work within a unified framework while supporting various technology stacks.
Conclusion
Mitosis enables developers to maintain a consistent design system across various web frameworks. By allowing you to write your UI components once and deploy them on multiple platforms, Mitosis enhances productivity and ensures a uniform user experience. When used with Visual Copilot, you can seamlessly translate Figma designs into precise, functional code that can easily be maintained across frameworks.
For further learning, refer to the Mitosis documentation and learn about Visual Copilot: Figma to code with AI.
Share